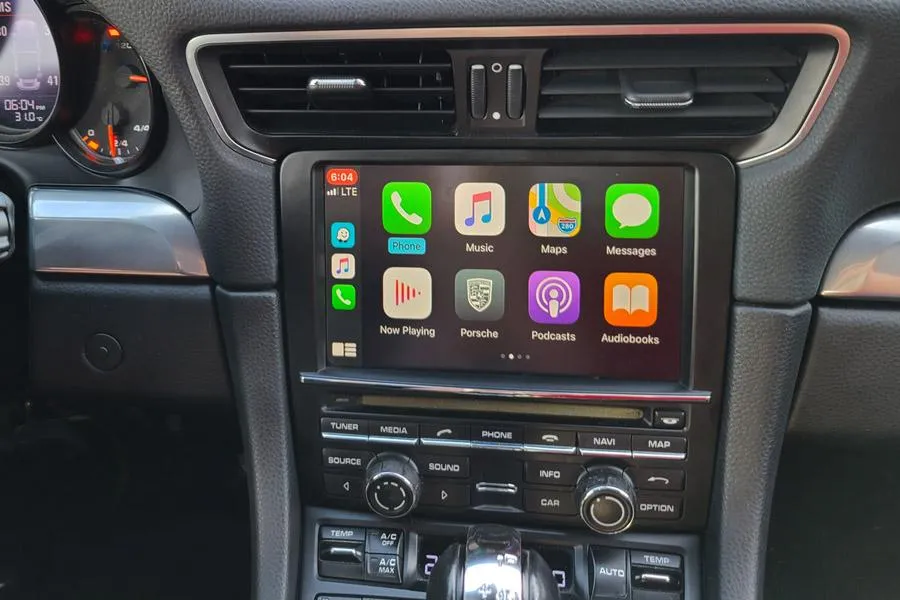
How to Install the GTA Car Kit in Your Porsche 911 (2012-2016)
If you're looking to modernize your Porsche 911 (991.1) with Apple CarPlay or Android Auto, the GTA Car Kit is a fantastic solution. This guide will walk you through the step-by-step installation process to seamlessly integrate wireless CarPlay and Android Auto into your vehicle.
Tools and Materials Needed:
T-25 Screw driver
T-9 Screw driver
Flathead Screw driver
Zip ties (optional for cable management)
Installation Steps:
Step 1: Prepare the Vehicle
Park your Porsche on a level surface and turn off the ignition.
Disconnect the negative terminal of the battery to prevent electrical shorts. (please be aware you will have to be able to place car in "D-Drive" to be able to pull PCM out of dashboard)
Step 2: Remove the Center Console Trim
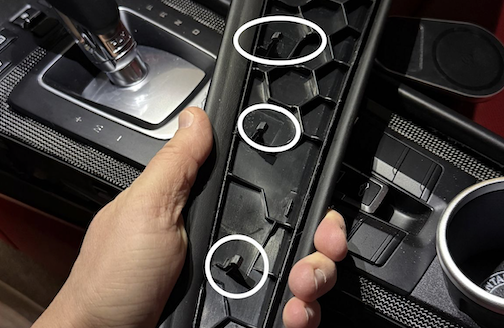
Use a trim removal tool to gently pry off the trim around the PCM (Porsche Communication Management) unit. I like to start closest to the armrest and slowly move forward. Closest to the PCM you have to slightly lift on the point (closest to the armrest) slimly up towards to roof and Pull down and away by the PCM. That part is a bit tricky and be sure not to loose or damage the clip that is loosely on the front part. (see pic)
Porsche Trim Piece
Remove any visible screws securing the PCM unit with T-25 (there are 4 of them. Two on each side)
Step 3: Remove the PCM Unit
For this next part you will need to place your car in Drive so make sure your park brake is on (just in case)
Before sliding the PCM out I would recommend placing a large microfiber towel over your instrument cluster to help protect and not scratch it all up. Then start to carefully slide the PCM unit out of the dashboard.
Porsche PCM sitting on top of large microfiber towel
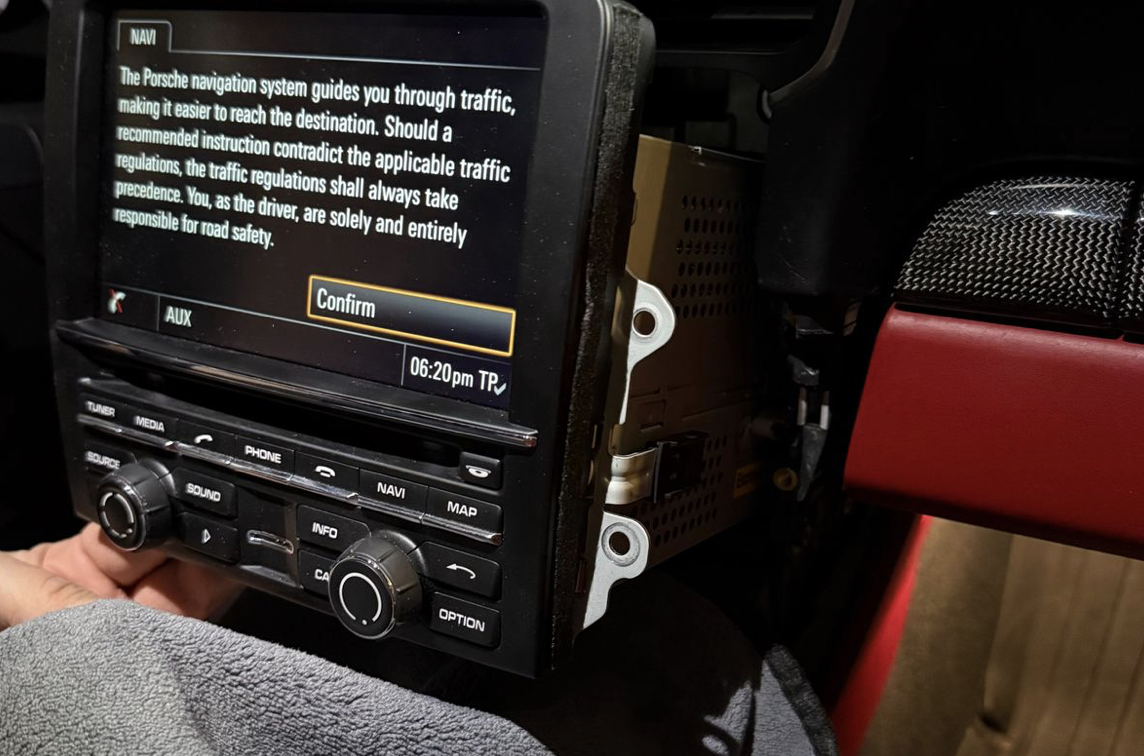
Disconnect the wiring harnesses from the back of the PCM and all the other fun wires as well. They can be a bit tricky so what I like to do it get a thin screwdriver place it under wire to apply pressure and press the top of the connector to get it to move. Pressing on it with your finger an pulling gets very tiring and not my fingers got pretty raw after two of them.
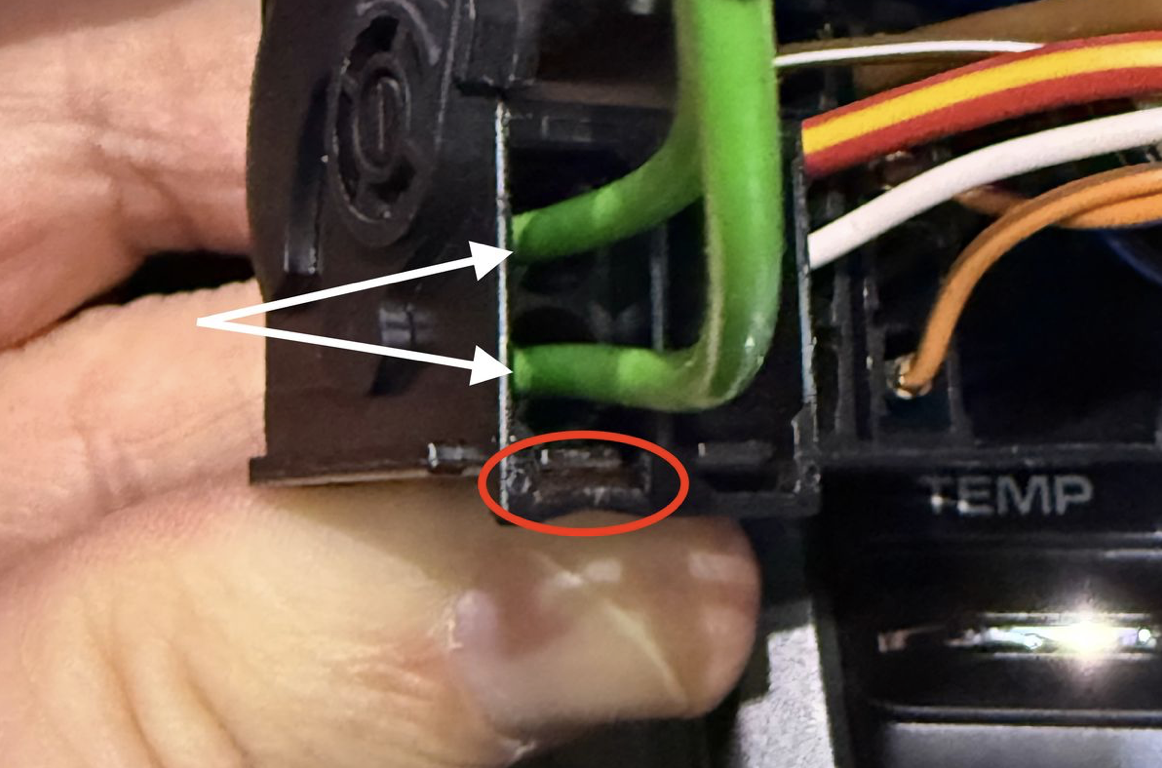
NOTE: if you have the Burmaster upgrade you will need to remove the two green fiberoptic wires. They are in a single clip. All you need to do is press down on the back of the plug (marked in red) and at the same time pull lightly on the green cables and transfer them to the GTA harness. (see pic)
Burmaster fiberoptic cables in side PCM
Step 4: Connect the GTA Car Kit
Now the fun part begins. It is a bit nerve racking but it just seem intimidating but it really isn't so just follow the instructions and you will be fine. BUT if you do run into some issues feel free to give me a call and I will do my best to help walk you through it.
Get yourself a clean working area and place with a long flathead screw driver as well as a little T-9 for the screws.
There are two long screws on top closes to the PCM Screen as well as two short ones on the bottom.
Top view of PCM from Porsche
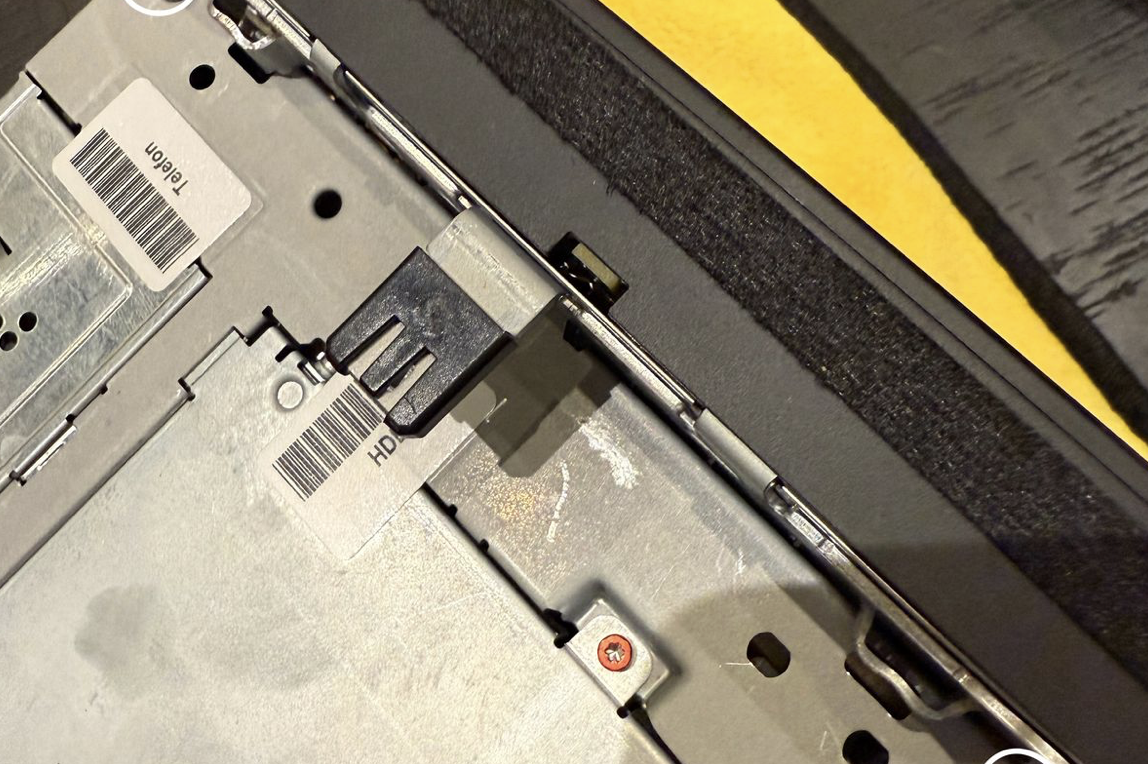
Once you have removed these 4 screws be care full not to just YANK off the screen because there TWO tabs on both sides that you will need to push in just a bit so you can separate the screen from the PCM and there are two BAND wires still connected that need to be unplugged first.
Side view of tabs
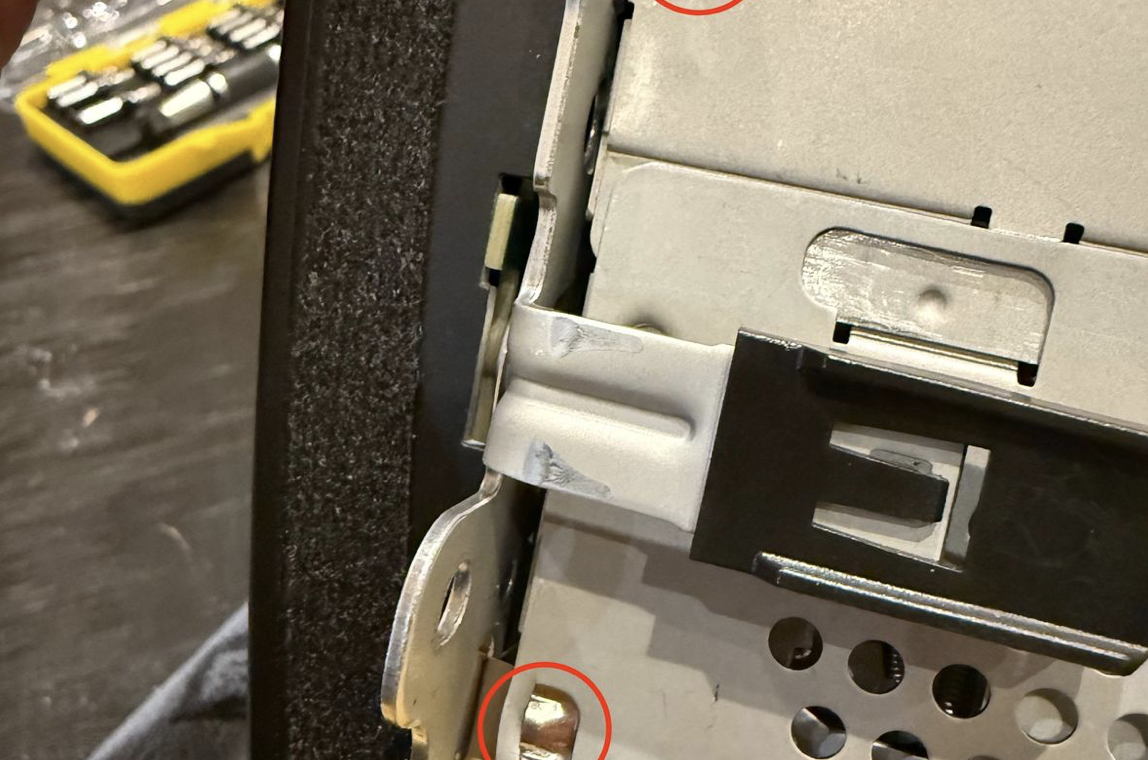
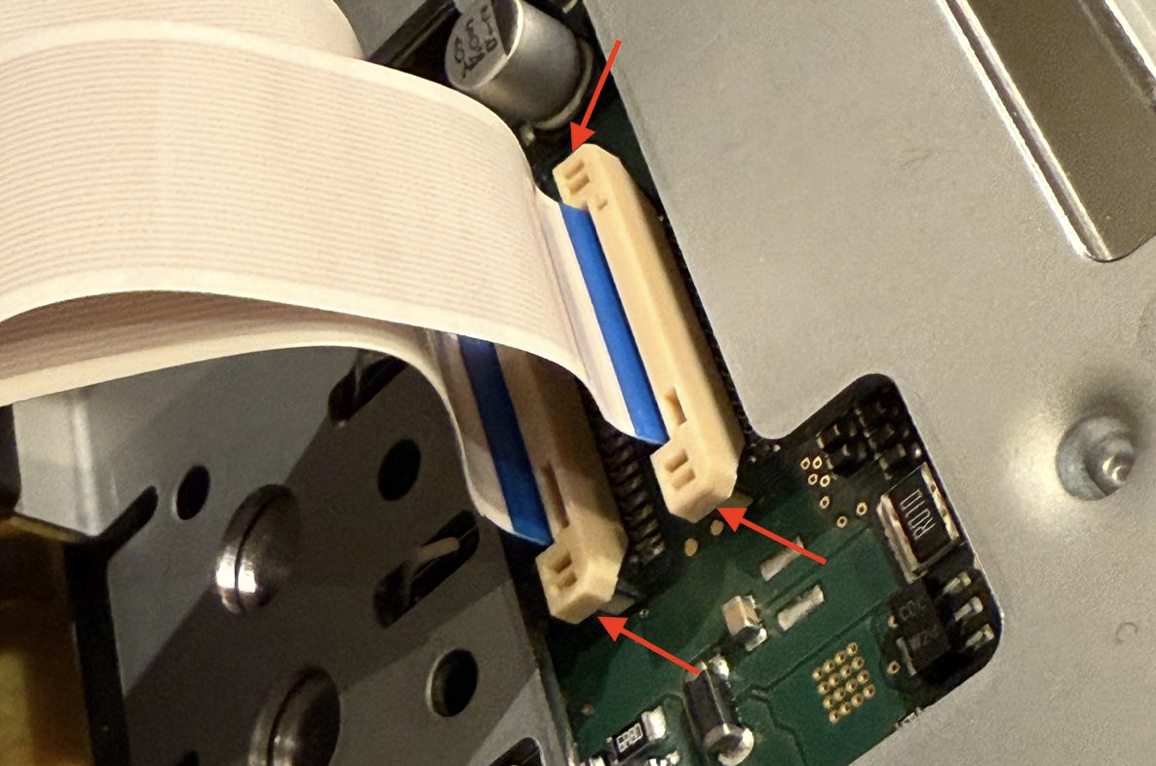
Carefully lean the screen forward and pop up the two sides of the two wires (see pic). A thin flathead screwdriver helps is the tool I like to use. This will unclamp them from the screen and you will be able delicately pull out the band wires from the screen so that you can then remove the screen and put it off to the side on a microfiber towel.
Banded wires from PCM
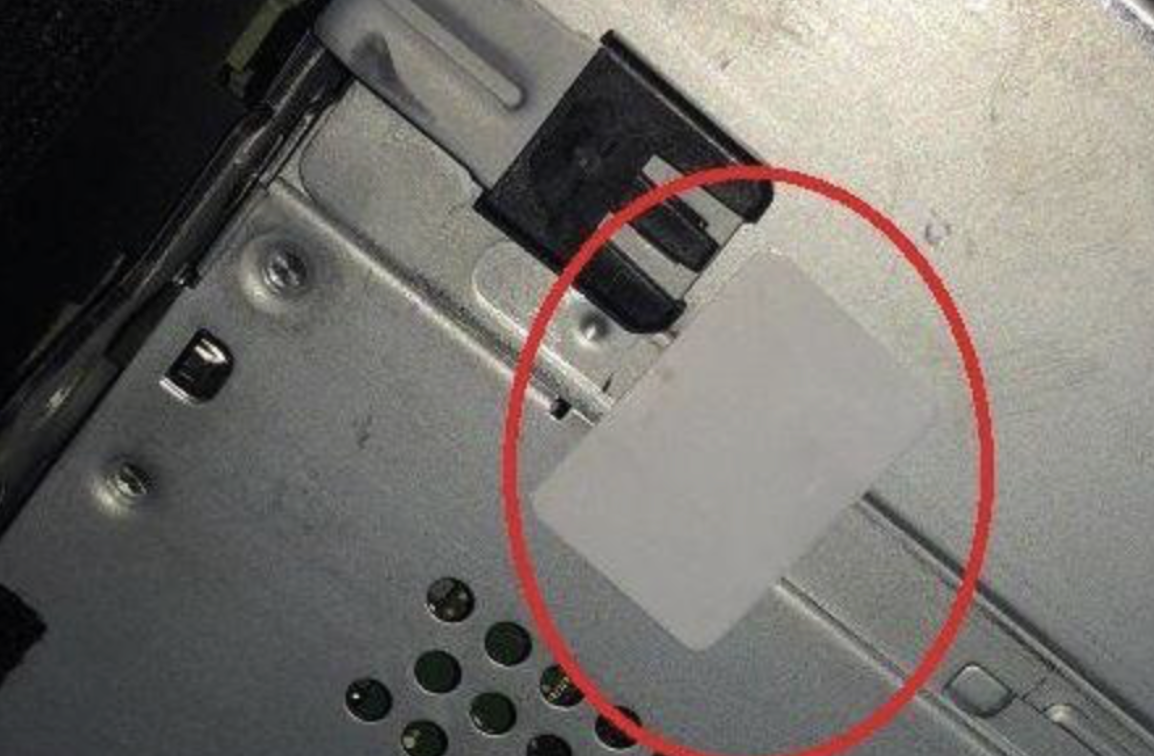
On the back there are THREE more screws that need to be removed so then you can slide the top from the bottom. (SIDE NOTE) There is also a sticker on the side...if this is broken it will void your factory warranty (if you still have it). So I would carefully with a razor blade try to remove it without damaging this little thin sticker. Be sure when separating top from bottom to be careful because there is ONE large Band Wire connecting the top from the bottom.
Security sticker on side of PCM
There are three screws that will need to be removed (see pic) so you can install the golden pillars so that the new board sits above the other stock internal components.
Internal view of PCM
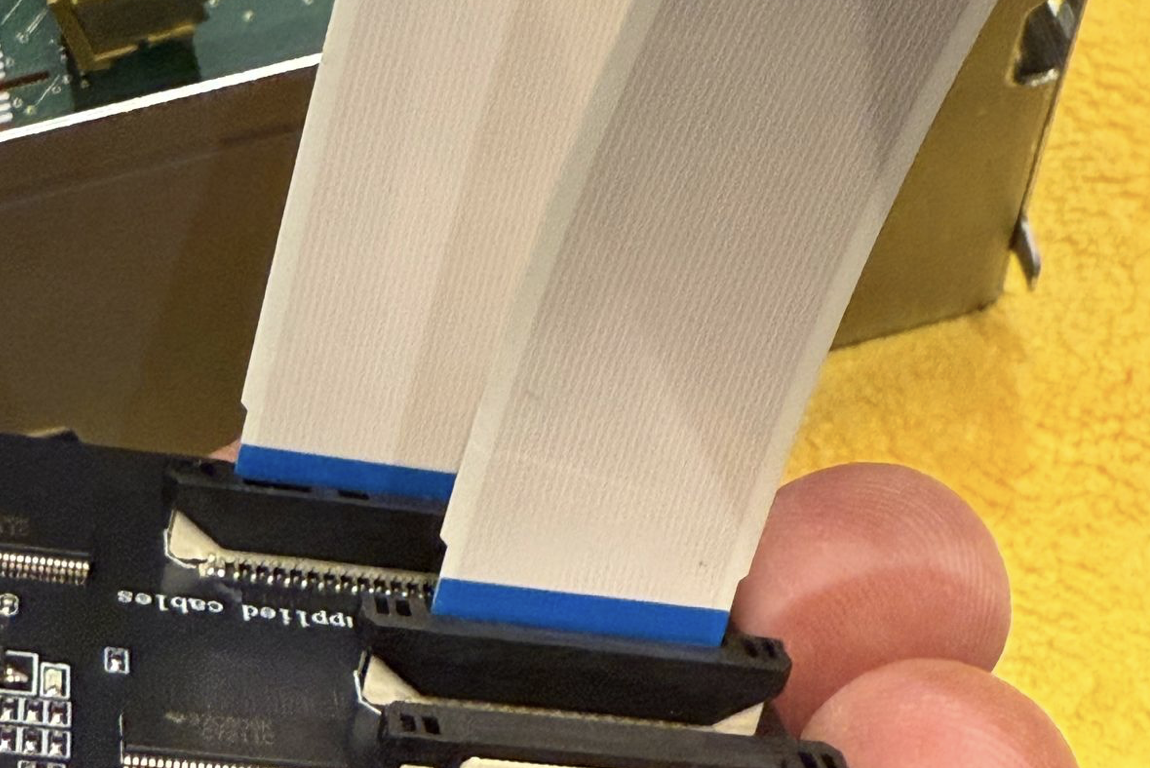
Your GTA Car Kit comes with two new Band Wires. To install these band wires the blue part needs to be facing the clip part. One narrow one and one wide one. Connect those (respectively) to the board that comes with the kit as shown in the picture furthest way from the little arm (you'll know what I'm talking about). Also the Kit comes with a small antenna. In the video here you will see them discuss and install two antennas however the newer version only has ONE.
Banded wires on new board
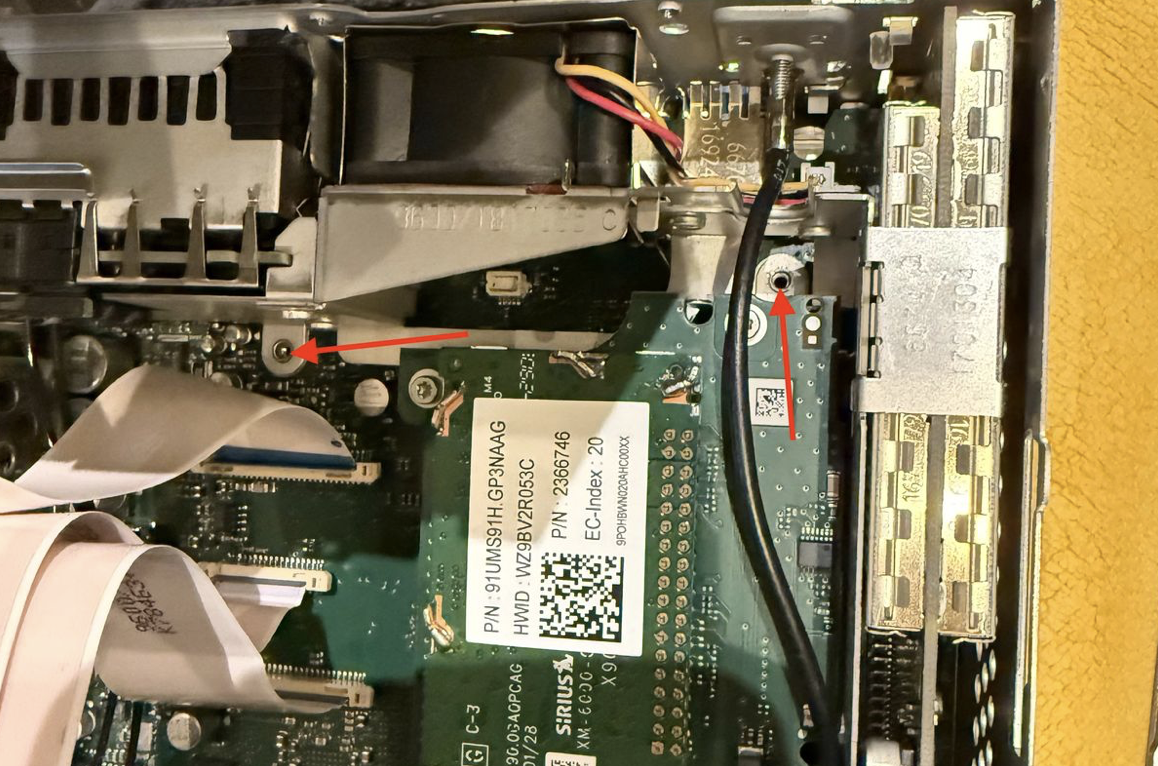
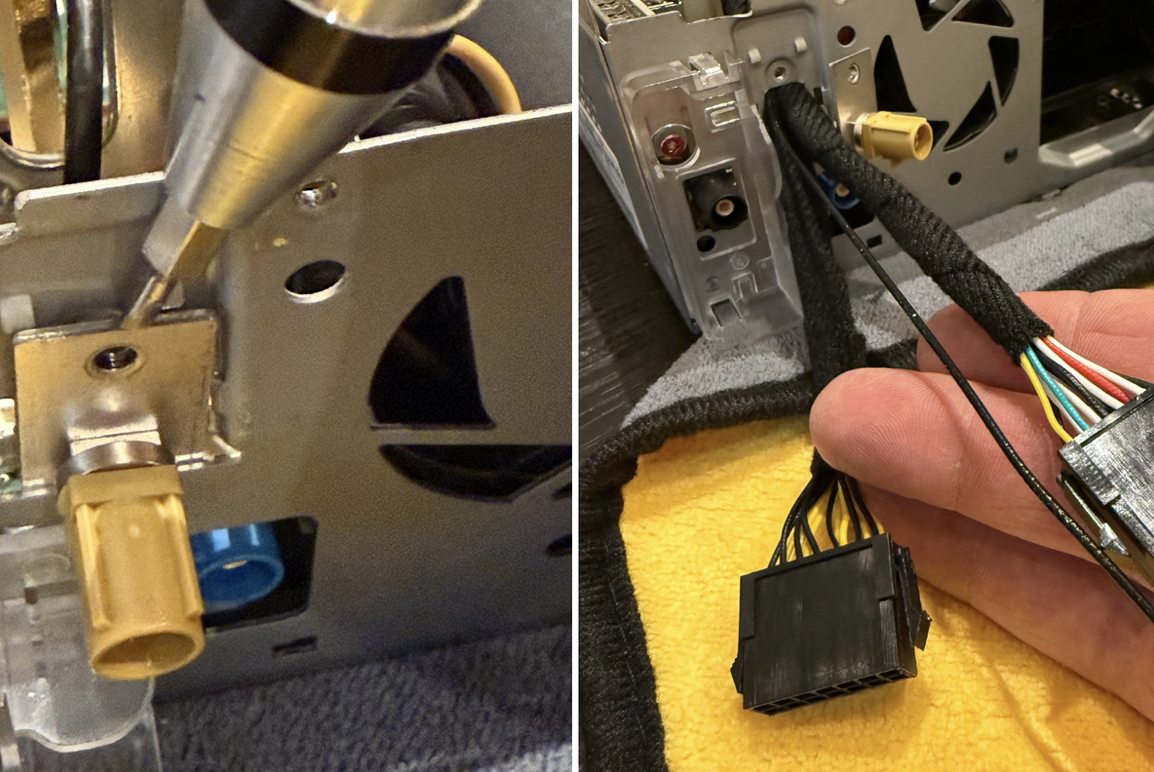
If your car is fitted with XM you will now remove the screw and the use that opening to fish through both of the wire bundles that come with the kit as well as the black single antenna wire (which I looped and taped to the top of the unit) Do this carefully not to pinch or break any of the wires.
XM antenna connection on PCM
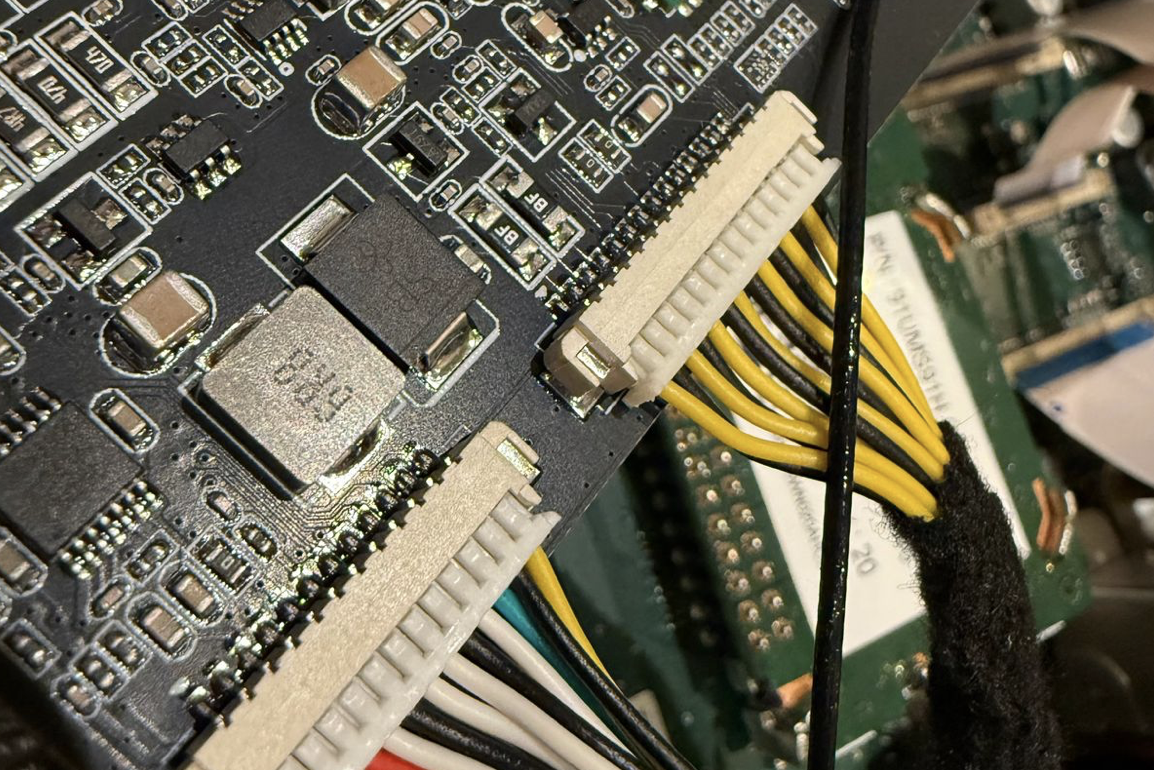
Clip both white end into their designated slots on the board. The XM wire will not get screwed back on so let it dangle
Wire connections to new board
Now place the board ontop of the golden pillars and snug them down with the screws you removed earlier in those locations.
Mounting screws for new board inside PCM
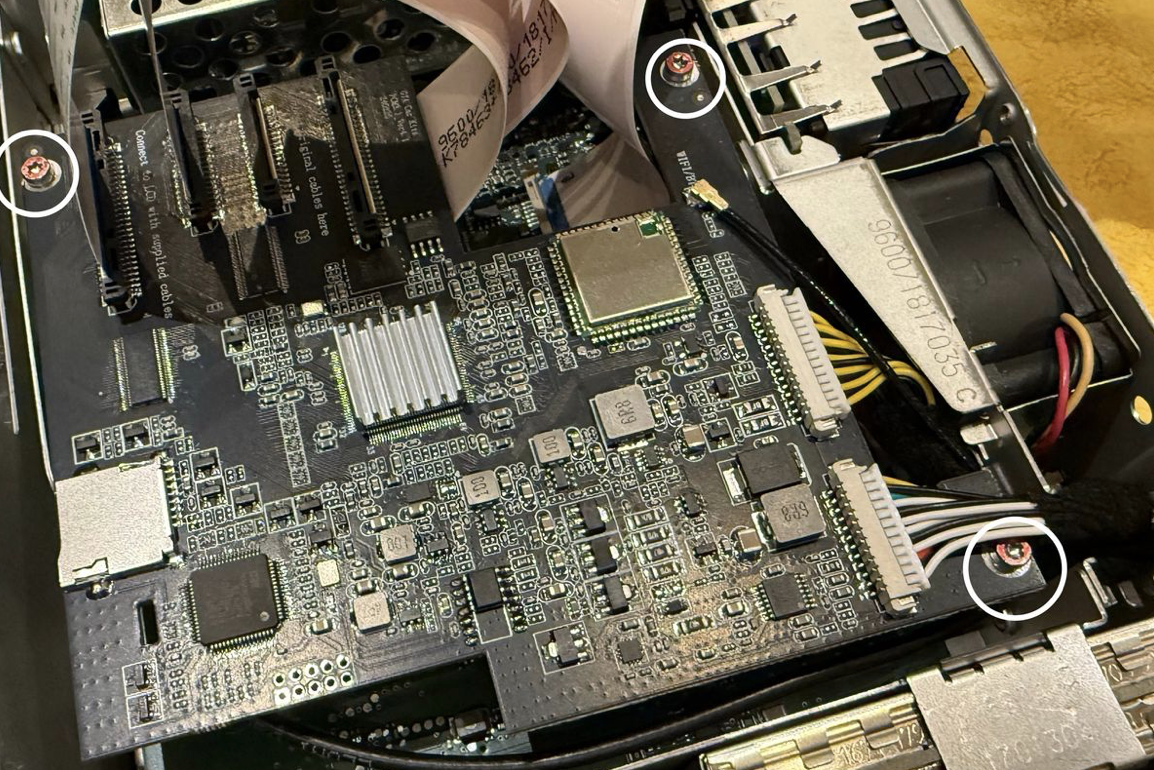
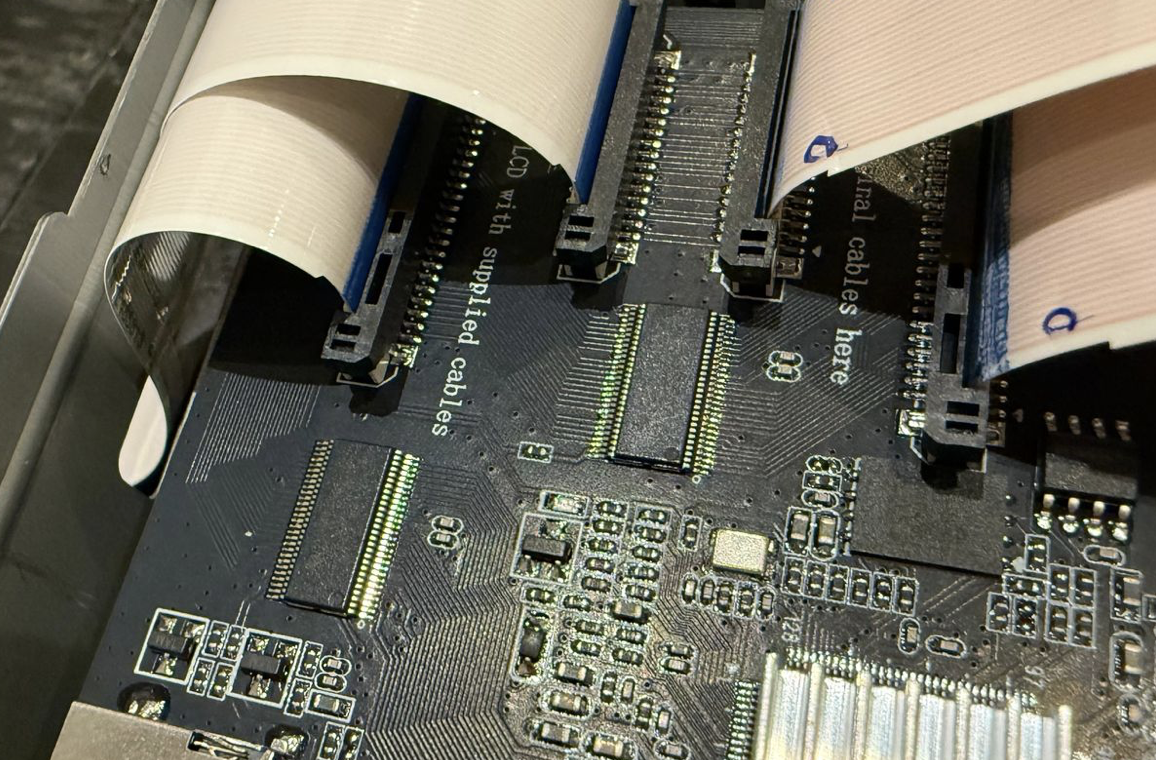
The two banded wires that were used to connect the screen will now be connected to the newly installed board.
Band wire connection in PCM
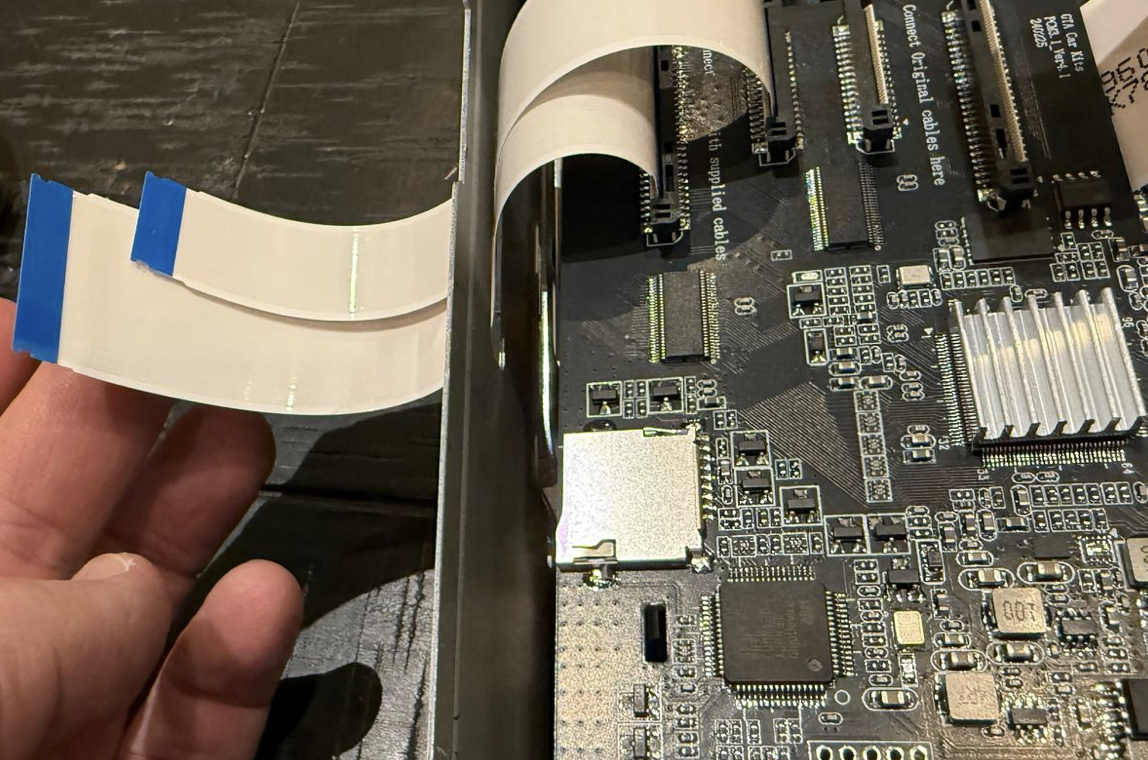
Fish the two new banded wires through the hole on the front of the PCM so that we can connect the screen again later.
Band wires from PCM
At this point we are going to reverse everything. Double check all your bands that they are nice and snug and the clips are all pushed down all the way. close up the PCM and reconnect the screen so we can get it back into the car
Carefully slide the PCM unit back into place, ensuring no wires are pinched. And again to get the PCM to slide in the car will need to be in "D"rive just to clear the area to get the PCM into place. Use that towel again to cover your dash. The Engsta Rides Microfiber towel is a perfect size.
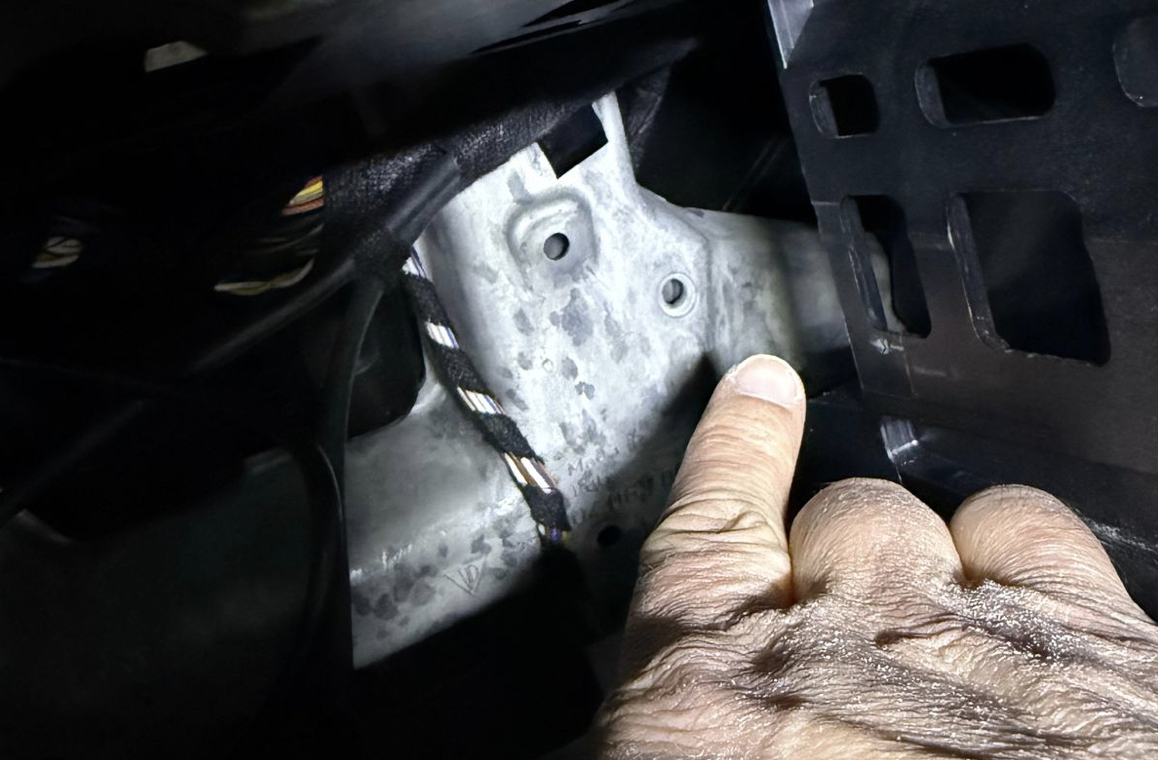
Feeing the wires and getting the PCM to sit flush can be the tricky part but...for the USB connection, I ran mine through the back passenger corner and into the gloveox. I also used the opening in the back left corner to guided all the EXTRA wire into.
PCM Cavity
Before you reinstall all the screws put car back in park, reconnect the battery and turn the accessory power. Test to see if it all comes back on. If you run into issues at this point it is not screwed into place and you might have a connection that is loose and tight.
If everything is nice and functional turn car back off, reinstall the screws to tighten the PCM back into place and put the trim pieces back.
Now it is time to fire her up and pair your device to the GTA Car Kits. For that you will need to plug it into the USB that you wired in and it will take it from there.
Final Thoughts
Installing the GTA Car Kit in your Porsche 911 is a straightforward upgrade that dramatically enhances your in-car experience. With wireless CarPlay and Android Auto, you’ll enjoy seamless connectivity and modern infotainment features.
Got questions or need help? Hit us up Engsta Rides or watch this video from GTA Car Kit!
But while you're here, check out our other blogs for more killer car upgrades, mods, maintenance or just car talk!
Stay fast, stay connected, and keep the drive alive! 🚗💨
Sgt. Engster, Martin M. USMC

